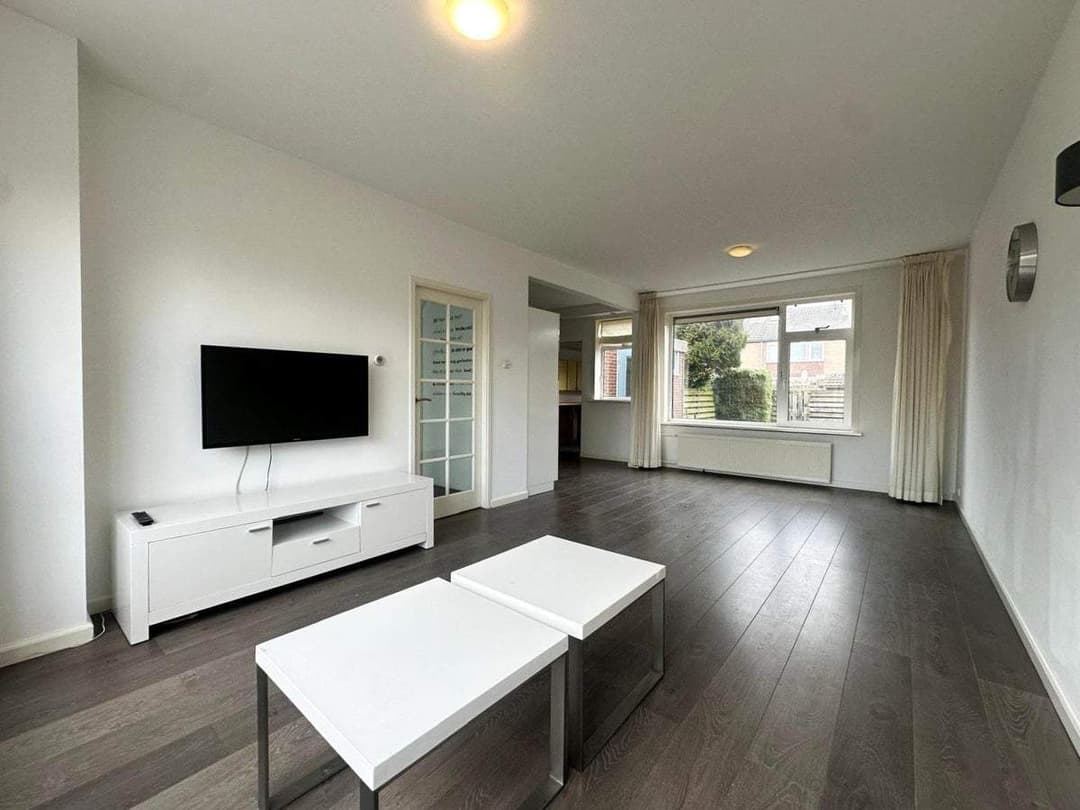
Move-In Checklist Template for Renters in the Netherlands
Laden Sie eine Umzugscheckliste für Mieter in den Niederlanden herunter. Stellen Sie einen reibungslosen Übergang sicher, indem Sie wichtige Aufgaben wie Inspektionen, Versorgungsunternehmen und Mietverträge verfolgen.
Vorlagen
Inhaltsverzeichnis
Weiterführende Lektüre
Vorbereitung Ihrer niederländischen Mietwohnung für neue Mieter: Einzugs-Checkliste
Eine sofort einsetzbare Make-Ready-Checkliste für niederländische Mietobjekte. Reinigung, Sicherheitsprüfungen, Zählerstände, Schlüssel, Energieausweis und ein Einzugsprotokoll für die Niederlande.
Vorlagen
Mieter Willkommenspaket Vorlage für niederländische Mietimmobilien
Geben Sie Ihrem neuen Mieter mit dieser Willkommenspaketvorlage für Mietobjekte in den Niederlanden alle wichtigen Informationen.
Vorlagen
Sicherheitskautionsrückerstattungsformular Vorlage für Mieter & Vermieter in den Niederlanden
Verwalten Sie Kautionsrückerstattungen in niederländischen Mietverhältnissen einfach mit diesem klaren und professionellen Rückerstattungsformular. Entworfen für Mieter und Vermieter.
Vorlagen
Muster für Mietsteigerungsschreiben Niederlande – Mieter rechtlich benachrichtigen
Informieren Sie Ihren Mieter über eine Mietsteigerung mit dieser offiziellen Vorlage, die auf den niederländischen Mietmarkt zugeschnitten ist.
Vorlagen
Neueste Immobilien in den Niederlanden
Entdecken Sie die neuesten Immobilien auf Luntero. Finden Sie neue Wohnungen, Häuser und Studios in den gesamten Niederlanden – täglich aktualisiert, um Ihr neues Zuhause schneller zu finden.
Deine Traumwohnung in den Niederlanden zu finden war noch nie so einfach.
Luntero vereint Mietangebote der besten und vertrauenswürdigsten Wohnungsportale und bietet dir einen vollständigen und stets aktuellen Überblick – alles an einem Ort.
Umfassende Angebote
Entdecke alle verfügbaren Mietwohnungen auf verschiedenen Plattformen. Kein ständiges Wechseln zwischen Websites oder das Verpassen versteckter Schätze mehr.
Benutzerfreundliche Oberfläche
Navigiere mühelos durch unsere Seite dank eines intuitiven Designs, das die Suche nach deinem perfekten Zuhause einfach und angenehm macht.
Mehrsprachige Unterstützung
Durchsuche Angebote in deiner bevorzugten Sprache. Ob Englisch, Niederländisch, Spanisch oder eine andere Sprache – wir sind für dich da.
Echtzeit-Aktualisierungen
Bleibe immer auf dem neuesten Stand mit aktuellen Informationen. Unsere Seite wird kontinuierlich aktualisiert, damit du nie ein neues Angebot verpasst.
Verstehen Sie die niederländischen Mietbegriffe, bevor Sie den Vertrag unterschreiben.
Mieten in den Niederlanden bringt eigene Regeln, juristische Begriffe und Abkürzungen mit sich, die oft schwierig sind. Das Luntero Miet-Glossar ist Ihr Leitfaden für alle wichtigen Begriffe – von Mietverträgen, Kautionen und Maklergebühren bis zu Nebenkosten, Mietpreisregulierung und Mieterrechten. Ob Sie neu mieten, als Expat umziehen oder versteckte Kosten vermeiden möchten: Unser Glossar hilft Ihnen, klüger zu mieten, besser zu verhandeln und Fehler zu vermeiden.
Umzugscheckliste Vorlage
Der Umzug in eine neue Mietimmobilie ist ein spannender Meilenstein, bringt jedoch auch verschiedene Verantwortlichkeiten mit sich, die Mieter und Vermieter angehen müssen, um eine transparente und harmonische Mieterfahrung zu gewährleisten. Eine der effektivsten Möglichkeiten, den Zustand der Immobilie zu Beginn eines Mietverhältnisses zu dokumentieren, ist die Verwendung einer Umzugscheckliste. Diese Checkliste hilft, potenzielle Streitigkeiten über Kautionen zu vermeiden, da beide Parteien ein klares, gegenseitiges Verständnis des Zustands der Immobilie haben, bevor der Einzug beginnt. Im Folgenden finden Sie eine umfassende Anleitung und Vorlage, die Ihnen hilft, eine Umzugscheckliste effektiv zu erstellen und zu nutzen.
Warum eine Umzugscheckliste wichtig ist
Eine Umzugscheckliste dient als offizielles Dokument über den Zustand einer Mietimmobilie, bevor ein Mieter einzieht. Indem Mieter sorgfältig vorhandene Schäden oder Abnutzungen notieren, können sie sich davor schützen, für Probleme verantwortlich gemacht zu werden, die sie nicht verursacht haben, während Vermieter einen transparenten Überblick über den Status der Immobilie erhalten. Diese gegenseitige Klarheit fördert eine positivere Beziehung zwischen Vermieter und Mieter, reduziert Missverständnisse und vereinfacht den Auszugsprozess, indem sie eine Grundlage für den Vergleich des Zustands der Immobilie am Ende der Mietdauer bietet.
Wesentliche Komponenten einer Umzugscheckliste
Eine gut strukturierte Umzugscheckliste umfasst in der Regel die folgenden Elemente:
Immobilieninformationen: Dokumentiert grundlegende Details wie die Adresse der Mietwohnung, den Namen des Mieters und das Mietbeginn-Datum.
Raum-für-Raum-Bewertung: Bewertet den Zustand jedes Raums und seiner spezifischen Komponenten – Wände, Böden, Fenster, Türen, Geräte und Armaturen.
Allgemeine Elemente: Deckt übergreifende Elemente wie Rauchmelder, Heizungs- oder Kühlsysteme, Schlösser und den Zustand der Außenanlagen ab.
Zustandsdokumentation: Notiert den Zustand jedes Gegenstands (z. B. „gut“ oder „muss repariert werden“) und enthält Kommentare zu sichtbaren Schäden, Abnutzungen oder Mängeln.
Unterschriften: Sowohl Mieter als auch Vermieter überprüfen und unterschreiben die ausgefüllte Checkliste, um die gegenseitige Zustimmung zu bestätigen.
Empfohlener Prozess
Vor dem Einzug: Führen Sie einen gründlichen Rundgang durch die Immobilie mit dem Vermieter durch, um die Checkliste gemeinsam auszufüllen und sicherzustellen, dass alle bestehenden Probleme oder Bedenken dokumentiert werden.
Während der Mietdauer: Pflegen Sie die Immobilie, melden Sie umgehend auftretende Probleme und führen Sie Ihre eigenen Aufzeichnungen, falls zusätzliche Schäden oder Abnutzungen auftreten.
Bei Auszug: Verwenden Sie die ursprüngliche Umzugscheckliste, um den Zustand der Immobilie zu vergleichen und etwaige Unterschiede zu klären. Dies hilft zu bestimmen, ob ein Teil der Kaution für Reparaturen einbehalten werden sollte.
Tabelle: Umzugscheckliste Vorlage
Die folgende Tabelle skizziert eine empfohlene Struktur für Ihre Umzugscheckliste, einschließlich möglicher Spalten für den Artikel, seinen ursprünglichen Zustand, Kommentare oder vorhandene Schäden und einen abschließenden Platz für Unterschriften beider Parteien.
Abschnitt / Raum
Artikel
Zustand
Kommentare / Vorhandene Schäden
Mieter Initialen
Vermieter Initialen
Immobilieninformationen
Adresse der Mietwohnung
Name(n) des Mieters
Mietbeginn-Datum
Wohnzimmer
Wände, Böden, Decke
Gut / Befriedigend / Muss repariert werden
Notieren Sie Löcher, Risse oder Farbprobleme
Fenster, Türen
Gut / Befriedigend / Muss repariert werden
Überprüfen Sie Schlösser, Griffe, Dichtungen, Rahmen
Lichtquellen, Steckdosen
Gut / Befriedigend / Muss repariert werden
Notieren Sie funktionierende Glühbirnen und sichtbare Verkabelungsschäden
Küche
Geräte (Herd, Kühlschrank, Geschirrspüler)
Gut / Befriedigend / Muss repariert werden
Überprüfen Sie die Funktion, Sauberkeit und das Vorhandensein von Handbüchern
Schränke, Arbeitsplatten
Gut / Befriedigend / Muss repariert werden
Überprüfen Sie auf Absplitterungen, Flecken, lose Scharniere
Spüle, Sanitäranlagen
Gut / Befriedigend / Muss repariert werden
Suchen Sie nach Lecks, Wasserdruck, ordnungsgemäß abdichtenden Wasserhähnen
Schlafzimmer
Wände, Böden, Decke
Gut / Befriedigend / Muss repariert werden
Identifizieren Sie Schrammen, Flecken oder Farbinkonsistenzen
Schränke, Türen
Gut / Befriedigend / Muss repariert werden
Überprüfen Sie funktionierende Scharniere, Schlösser und Kleiderstangen
Lichtquellen, Steckdosen
Gut / Befriedigend / Muss repariert werden
Testen Sie Schalter und stellen Sie sicher, dass alle Steckdosen funktionsfähig sind
Badezimmer
Toilette, Spüle, Dusche/Badewanne
Gut / Befriedigend / Muss repariert werden
Überprüfen Sie auf Lecks, Verstopfungen, ordnungsgemäßen Wasserfluss
Fliesen, Fugen
Gut / Befriedigend / Muss repariert werden
Überprüfen Sie auf Risse oder Schimmelwachstum
Spiegel, Armaturen
Gut / Befriedigend / Muss repariert werden
Bestätigen Sie, dass Spiegel und Armaturen sicher sind
Allgemeine Elemente
Rauchmelder
Gut / Befriedigend / Muss repariert werden
Testen Sie Batterien und Funktionalität
Heizungs-/Kühlsysteme
Gut / Befriedigend / Muss repariert werden
Schalten Sie die Systeme ein, um die Funktion zu überprüfen
Türen, Schlösser
Gut / Befriedigend / Muss repariert werden
Bestätigen Sie, dass alle Schlösser reibungslos funktionieren, keine defekten Schlüssel
Außenzustand (falls zutreffend)
Gut / Befriedigend / Muss repariert werden
Notieren Sie den Zustand von Garten, Veranda oder Schuppen
Unterschriften
Unterschrift des Mieters
Unterschrift des Vermieters
Datum der Fertigstellung
Nutzen Sie diese Tabelle als Referenz oder Vorlage und passen Sie sie an die spezifischen Merkmale Ihrer Mietimmobilie an. Fühlen Sie sich frei, Zeilen für zusätzliche Räume oder Artikel hinzuzufügen, die bewertet werden müssen.
Tipps zum Ausfüllen der Checkliste
Fotos oder Videos machen: Ergänzen Sie schriftliche Notizen mit visuellen Beweisen. Das Festhalten von Bildern jedes Raumes und von vorhandenen Schäden kann zusätzliche Klarheit bieten, falls Streitigkeiten auftreten.
Fragen stellen: Wenn Sie sich über den Zustand eines bestimmten Gegenstands unsicher sind, konsultieren Sie den Vermieter oder Hausverwalter zur Klärung.
Kopien aufbewahren: Stellen Sie sicher, dass sowohl der Mieter als auch der Vermieter unterschriebene Kopien der ausgefüllten Checkliste aufbewahren. Dies hilft, die Vereinbarung zu festigen und fördert die Verantwortlichkeit auf beiden Seiten.
Government.nl Wohnungsbereich – Bietet allgemeine Informationen zum Mieten in den Niederlanden, einschließlich Mieterrechten und -pflichten.
Wie Luntero helfen kann
Bei Luntero haben wir uns zum Ziel gesetzt, Mietern und Vermietern zu helfen, transparente und sichere Mietvereinbarungen zu schaffen. Unsere Plattform bietet:
Erweiterte Suchfilter: Nutzen Sie unsere Suche, um Mietobjekte zu finden, die von verantwortungsbewussten Vermietern verwaltet werden, die Wert auf die Pflege der Immobilien und transparente Kommunikation legen.
Ressourcen-Hub: Entdecken Sie unsere Leitfäden und Artikel, die wichtige Themen wie Mieterrechte, Umzugschecklisten und Kautionen abdecken, damit Sie sich während des Mietprozesses sicher fühlen.
Community-Foren: Vernetzen Sie sich mit anderen Mietern über die Community-Seiten von Luntero, teilen Sie persönliche Erfahrungen, Empfehlungen und Ratschläge zu effektiven Umzugschecklisten.
Durch die Nutzung der Suchwerkzeuge und Ressourcen von Luntero können Sie eine Mietimmobilie finden, die Ihren Kriterien entspricht, und von Anfang an ein respektvolles, klares gegenseitiges Verständnis zwischen Ihnen und Ihrem Vermieter sicherstellen.
Fazit
Eine Umzugscheckliste ist ein entscheidender Schritt, um Klarheit zu schaffen und Streitigkeiten über Kautionen oder den Zustand der Immobilie am Ende des Mietverhältnisses zu vermeiden. Indem Sie den Zustand jedes Raums systematisch dokumentieren, vorhandene Probleme notieren und sicherstellen, dass beide Parteien die Checkliste unterschreiben und Kopien aufbewahren, schaffen Sie eine transparente Grundlage für Ihr Mietverhältnis. Die Implementierung einer gründlichen Umzugscheckliste schützt nicht nur Mieter vor unbegründeten Kosten, sondern bietet auch Vermietern dokumentierte Nachweise über den ursprünglichen Zustand der Immobilie. Egal, ob Sie ein erfahrener Mieter oder neu in den Niederlanden sind, die Zeit, die Sie sich nehmen, um diesen Prozess gewissenhaft abzuschließen, kann Ihre Mieterfahrung erheblich verbessern.
Bei Luntero setzen wir uns dafür ein, positive und transparente Beziehungen zwischen Mietern und Vermietern zu fördern und umfangreiche Ressourcen anzubieten, die Ihnen helfen, fundierte Entscheidungen zu treffen und einen reibungslosen Mietverlauf zu gewährleisten.
Umzugscheckliste
Verwenden Sie diese Checkliste, um den Zustand Ihrer Mietimmobilie beim Einzug gründlich zu dokumentieren. Setzen Sie ein Häkchen in jedes Feld, nachdem Sie den entsprechenden Artikel inspiziert haben. Sie können sie ausdrucken und Ihrem Mietvertrag beifügen oder für Referenz während und nach Ihrer Mietdauer aufbewahren.
[ ] Immobilieninformationen
[ ] Adresse der Mietwohnung
[ ] Name(n) des Mieters
[ ] Mietbeginn-Datum
[ ] Vermieter/Hausverwalter Kontakt
[ ] Vollständiger Name / Firmenname
[ ] Telefonnummer
[ ] E-Mail-Adresse
[ ] Eingang / Flur
[ ] Wände, Böden und Decke (auf Risse, Schrammen, Flecken überprüfen)
[ ] Türen und Schlösser (sichere Verriegelung und einfache Bedienung überprüfen)
[ ] Lichtquellen und Schalter (Funktionalität testen)
[ ] Steckdosen und Elektrik (sichtbare Schäden?)
[ ] Garderobe oder Abstellraum (Türen, Regale, Sauberkeit)
[ ] Wohnzimmer
[ ] Wände, Böden und Decke (Flecken, Absplitterungen oder Verfärbungen)
[ ] Fenster (Rahmen, Schlösser, Dichtungen und Sauberkeit überprüfen)
[ ] Türen (Innen- oder Terrassentüren funktionieren ordnungsgemäß)
[ ] Lichtquellen und Steckdosen (Glühbirnen vorhanden und funktionsfähig)
[ ] Heizungs- oder Kühlluftöffnungen/Radiatoren (sicherstellen, dass sie nicht blockiert sind und in gutem Zustand sind)
[ ] Möbel (falls möbliert, Polsterung, Oberflächen und Kratzer überprüfen)
[ ] Küche
[ ] Geräte (Herd, Backofen, Kühlschrank, Geschirrspüler, Mikrowelle testen)
[ ] Herd/Backofen Temperatureinstellungen
[ ] Kühlschrank/Gefrierfach Kühlfunktion
[ ] Geschirrspüler (falls möglich einen kurzen Zyklus laufen lassen)
[ ] Schränke und Schubladen (Scharniere, Griffe und Sauberkeit überprüfen)
[ ] Arbeitsplatten (auf Risse, Flecken oder Absplitterungen überprüfen)
[ ] Spüle und Sanitär (Wasser laufen lassen, auf Lecks überprüfen, Müllentsorgung testen, falls zutreffend)
[ ] Bodenbelag (auf lose Fliesen, Dellen oder Wasserschäden überprüfen)
[ ] Belüftung oder Dunstabzugshaube (Lüfter und Licht testen)
[ ] Schlafzimmer
[ ] Wände, Böden und Decke (auf Schrammen, Kratzer oder Feuchtigkeit überprüfen)
[ ] Fenster (Schlösser, Dichtungen, Zustand des Glases)
[ ] Türen und Schränke (sicherstellen, dass Scharniere, Griffe und Stangen fest sind)
[ ] Lichtquellen und Steckdosen (Funktionalität sicherstellen, keine freiliegenden Kabel)
[ ] Heizung oder Kühlung (überprüfen Sie Radiatoren oder Klimaanlagenöffnungen auf ordnungsgemäßen Fluss)
[ ] Möbel (falls möbliert, Bettrahmen, Matratzen und Kommoden auf Schäden überprüfen)
[ ] Badezimmer
[ ] Toilette (richtig spülen, auf laufendes Wasser oder Lecks überprüfen)
[ ] Spüle und Armaturen (Wasser laufen lassen, Entwässerung überprüfen, auf Lecks achten)
[ ] Dusche/Badewanne (Wasserdruck, Temperatur testen, richtig abfließen)
[ ] Fliesen und Fugen (auf Risse oder Schimmel überprüfen)
[ ] Spiegel, Schränke und Regale (Stabilität und Sauberkeit überprüfen)
[ ] Belüftungsventilator (Funktionalität und Schimmelabwesenheit überprüfen)
[ ] Allgemeine Elemente
[ ] Rauchmelder (Batterien und Funktion testen)
[ ] Kohlenmonoxidmelder (falls zutreffend)
[ ] Heizungs-/Kühlsysteme (Radiatoren, Wärmepumpen oder Klimaanlagen)
[ ] Türen, Schlösser und Schlüssel (jedes Schloss testen, bestätigen, dass alle Schlüssel bereitgestellt und funktionsfähig sind)
[ ] Internet-/Kabelsteckdosen (Standort und Zustand überprüfen, falls erforderlich)
[ ] Außenzustand (falls zutreffend: Veranda, Balkon, Garten, Lagerräume)
[ ] Vorhandene Schäden / Kommentare
[ ] Dokumentieren Sie alle oben nicht genannten Probleme, wie Kratzer auf dem Boden, abblätternde Farbe an den Wänden oder nicht funktionierende Armaturen.
[ ] Listen Sie Gegenstände auf, die sofortige Reparaturen oder weitere Inspektionen erfordern.
[ ] Geben Sie zusätzliche Anmerkungen zum allgemeinen Zustand der Immobilie an.
Unterschrift auf der Checkliste
Unterschrift
Name
Datum
Unterschrift des Mieters
Unterschrift des Vermieters
Zeuge (falls zutreffend)
So nutzen Sie diese Checkliste
Rundgang mit dem Vermieter: Planen Sie einen Rundgang mit Ihrem Vermieter, um die Checkliste gemeinsam auszufüllen und sicherzustellen, dass beide Parteien sich über den ursprünglichen Zustand der Immobilie einig sind.
Fotos und Videos anhängen: Um zusätzliche Klarheit zu schaffen, machen Sie Fotos oder Videos von jedem Raum, wobei Sie sich auf vorhandene Abnutzungen oder Schäden konzentrieren. Benennen Sie diese Dateien klar und speichern Sie sie zusammen mit Ihrer ausgefüllten Checkliste.
Kopie aufbewahren: Bewahren Sie eine unterschriebene Kopie der Checkliste für Ihre Unterlagen auf. Dieses Dokument dient als wertvoller Beweis, falls Streitigkeiten über den Zustand der Immobilie auftreten.
Laufende Wartung: Melden Sie während Ihrer Mietdauer umgehend neue Probleme dem Vermieter. Die Dokumentation dieser Anliegen hilft, Transparenz zu wahren und Missverständnisse beim Auszug zu vermeiden.
Durch die Befolgung dieser Umzugscheckliste können sowohl Mieter als auch Vermieter eine transparente, faire und effiziente Mietvereinbarung fördern, die die Wahrscheinlichkeit von Streitigkeiten verringert und von Anfang an ein angenehmeres Wohnerlebnis gewährleistet.
Luntero Miet-Glossar
Verstehen Sie die niederländischen Mietbegriffe, bevor Sie den Vertrag unterschreiben.
Mieten in den Niederlanden bringt eigene Regeln, juristische Begriffe und Abkürzungen mit sich, die oft schwierig sind. Das Luntero Miet-Glossar ist Ihr Leitfaden für alle wichtigen Begriffe – von Mietverträgen, Kautionen und Maklergebühren bis zu Nebenkosten, Mietpreisregulierung und Mieterrechten. Ob Sie neu mieten, als Expat umziehen oder versteckte Kosten vermeiden möchten: Unser Glossar hilft Ihnen, klüger zu mieten, besser zu verhandeln und Fehler zu vermeiden.